Q&A Site Social Login and Layout-Sharing Site Launches

While Apple gnaws on the 1.3.7 update (should be released in the next few days, watch for the announcement here), I’m working on the MIDI Designer website. Two big changes: Social Login and the launch of the Layout Sharing Site.

Q&A Site Allows for Social Login

The Q&A site has really been taking off, but users have not been registering with the site. This makes a lot of sense. Who wants to do another login and password for every product they own? Now, you can register on the MIDI Designer website with your login from Facebook, Google, Twitter, and several other options (thanks to OneAll and WordPress).

In addition, thanks to ShareThis! you can share any post on MIDI Designer (even this one!) via a variety of social networks.

Sharing of MIDI Designer Layouts Begins!

MIDI Designer users have been asking for a place to share MIDI Designer layouts since we launched. Finally, via the Q&A site, we provide this functionality.

You can include arbitrary attachments (like your .mididesigner files), images, PDFs and descriptions/instructions/notes about your layout. Let the sharing begin!

(Huge thanks to Question2Answer! None of this would be possible without you. And I should mention StackExchange, who invented all of this)

Through The Fog: A and B

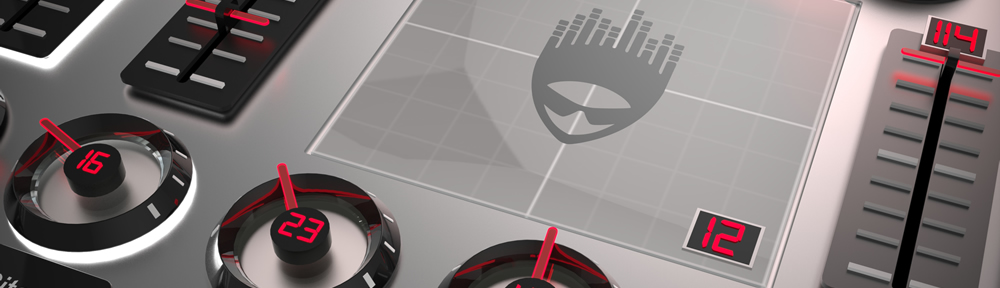
I’m working on rig design tonight for my own drum rig, which includes MIDI Designer (of course), Maschine, Ableton, and Guitar Rig. What I’m trying to do with my rig isn’t hit all the possibilities. In fact, I’m trying to find “a way through the fog” by simplifying.

For instance, I can apply effects to each drum, to each kit or to the whole mix. The first two of these options are too fine for me (since I play 8 kits at once) and the last one is too coarse. What I want is to be able to control what goes through which effects, but without getting lost in a sea of different effects chains.

The answer, for me, is one that I’ve come back to over the last two years a lot. It’s always the same: “Copy from DJs.” So I make A and B effects chains (which actually get joined later on and put through a Korg Kaoss pad), and routing matrix with buttons to route the drum kits to one, the other, or both.

This is exciting because it means that I can get back to some of the features I most love about MIDI Designer: those that refer to an A-B rig.

Copy A to B/B to A

In MIDI Designer, you can copy values from one set of controls to another. What this means is that if you’ve got your A chain set up with distortion on, and reverb configured in a particular way, you can COPY that to your B chain, and then change reverb and add, say, beat delay. And now you can crossfade between two effects chains that are similar, but different.

There are two relevant controls for this. One to define the B control of a control (must be on the same page, but only to set it).

And the buttons that push A values to B and vice versa.


Crossfader

Crossfaders are very particular, because they move two knobs. In the simplest case (linear, which is all we do for now) one of the knobs goes from min to max at the halfway point and stays there. The other one goes from max to min, but doesn’t start until you reach mid-turn. MIDI Designer allows you to do with any two knobs.

Now to be fair, every DAW (or at least Ableton, which I know best, and Reaper) will allow you to do some kind of crossfade. But this is a unique thing, because you’re actually building a crossfader out of parts… which you can use for other things.

I’ll need to do a video on how to set up a crossfader very soon. (In the meantime, the answer is: make the two knobs subcontrols of a third control, make one of them subtype “inverted” and make them both crossfader pieces. )

Concluding Remarks

Anyway, my original point was that in my rig I’m not trying to have all possibilities. Many times I’m trying to limit how many controls I can adjust, so that My rig is playable. This is not the only aesthetic with which you can use MIDI Designer, and I’ll do an article on User #1’s vision of MIDI Designer sometime soon.

Thanks for reading and thanks for checking out MIDI Designer!


MIDI Designer 1.3.6 Released

Confusionists is proud to announce the arrival of MIDI Designer 1.3.6 for iPad versions Pro and Lite in the App Store.

1.3.6 builds upon and fixes version 1.3.5.

  • Snap to default values, from 0ms to 16 seconds.
  • “Make Similar” will now choose an incrementally related name (and unique on the page).
  • “Add Control” will choose a unique name on the current page.
  • Longer button labels (which go with the aspect ratio independent buttons introduced in 1.3.5.


See the full list of changes in the changelog.

MIDI Designer 1.3.5 Beta at Jam Session

MIDI Designer 1.3.5 is moving through beta testing right now with flying colors! Here’s me playing three Korg Wavedrums at last week’s THroNG session. THroNG is improvised ambient electronic music.

MIDI Designer is the locus of control for my entire rig (along with Line6 FBV Shortboard MKII), of course:

Alto Cumulus
Isochromatic
Nimbostratus
Orthochromatic

There are two other players on this session: Mike Rosenstark on guitar and the amazing Kevin Brown on bass. Mike’s rig also has MIDI Designer as the centerpiece. He’s using an iPad 3 with MIDI Designer Pro, two Behringer BCR2000’s and two Line6 FBV Shortboard MKIIs. There’s a reason that Mike Rosenstark is called “User #1.” Here’s a pic of his rig.

If you’ve got pics or experiences with MIDI Designer that you want to share, please drop me a line!

1.3.5 is Almost Out The Door

1.3.5 is feature-complete and I’m moving my main focus over to testing. This version is really special. It unlocks so many limitations of MIDI Designer that new users will be ecstatic, and current users will blown away.

What’s the big deal?

  • Features and fixes have been added to accomodate two-way MIDI hardware. For instance, users may use a Behringer BCR2000 as an external MIDI controller for MIDI Designer. See the Ultimate Hybrid page for more information.
  • LED Colors (affecting all controls, including button-on color) are now selectable per page. With 256 choices the newest MIDI Designer lets you make beautiful pages that are easy to recognize.
  • Sliders, crossfaders and buttons are now aspect-ratio free and can be huge, tiny or anywhere in between. Most controls have a new design and all are 100% Retina display ready.
  • Name labels are independently sizable (and supersizable).
  • New, fixed-width LED font used in many parts of the app.
  • Automatic reverse colors on Page Tabs, name labels and buttons for darker page colors.
  • Labels now sit behind all other controls, allowing for watermarks and other effects.
  • Panes are back! They sit behind labels, and have no border so you can combine them in interesting geometric shapes.

And much, much more…

I’m focusing on getting this version tested, bulletproof and ready for the App Store. Once that happens, I’ll be getting back to playing with MIDI Designer, making videos, twittering (I don’t “tweet”) and explaining MIDI Designer to a wider audience. 1.3.5 promises to be a historic moment for universal MIDI controllers.

Thanks for your patience and interest. A full listing of all new features and fixes is here.

Edit (May 18, 2012): During the alpha testing phase, I decided to remove the “watermarks” feature from this release. In lieu of this, labels now always sit behind controls, giving a meaningful way to label parts of your pages.

MIDI Designer Wins Sonic Touch Gold Award for Best App!

I’m absolutely ecstatic to announce that MIDI Designer Pro has won the Sonic Touch Gold Award.

Gaz Williams is using MIDI Designer Pro for a major rock opera production in Paris. Nick Batt, Sonic State Editor, goes over the app with Gaz. As you can tell, these guys have spent a lot of time with the app.

“incredibly well thought-out….”
“very cleverly made, so it’s easy to use…”
“closest rival is Lemur…A lot easier to use than Lemur….”

Great!

Here’s their 10+ minute review of MIDI Designer Pro:


and here’s the article on the Sonic Touch website:

Big shout out and thank you to Gaz Williams and Nick Batt. I’ll take this opportunity to say: we’re not done yet. 1.3.5 is coming out soon, and it’s a game-changer! Stay tuned!

Emoji for Your Labels!

I wasn’t aware of this until Mike Rosenstark pointed it out this morning. You can use Emoji — those cute little emoticons that the Japanese have somewhat standardized (read more in the Wikipedia article) — in your MIDI Designer labels, both on pages and controls.

Even better: you don’t have to pay for this feature. It’s already built into your iPad!

Short Instructions
Turn on the Emoji international keyboard in your iPad settings.

Long Instructions
Go to settings:

Select International:

Select Keyboards:

Tap “Add New Keyboard”:

Scroll down and select “Emoji”:

Now you can switch between keyboards using the “Globe” on your keyboard (to the left of the spacebar):

Now you can use Emoji in controls and page labels!


Note: If you’re using the Japanese keyboard, you can already access Emoji directly, but you probably know that already.

Update 2014-04-18
Emoji don’t size well, but a lot of the great stuff that does scale up can be found in the Kanji and other non-Western keyboards.

Update 2014-06-16
Emoji size perfectly well in iOS 7!

Emoji Size Perfectly in iOS 7 with MIDI Designer

Map One Button to Play and Stop in Ableton Live

User wrote me today:

i’ve another question
is it possible create a button that pressed once (turned to red) press “play” in Ableton Live, unpressed, press “stop”?

Sure! I never thought of that, but MIDI Designer allows for a lot of things I hadn’t thought of.

First, make three buttons and one knob like this:

Then use the button group feature to make the knob step through the two buttons at the top. Do this by making the knob a supercontrol, and then giving it two subcontrols: stop and play (in that order, though you can reorder.

Now when the play button comes on, it turns the little play button on. Otherwise it turns the little stop button on.

Then make the big play button a supercontrol of the knob. That play button will just toggle the knob to its max (on) and min (off), which happens to be the little play button (on) and the little stop button (off).

Then I finished this post and I realized that I hadn’t actually tried this out myself with Ableton Live. So when I finally did, it was impossible to map, because I’m always sending out two commands at once (stop-play or play-stop). So I temporarily shut off the knob’s “supercontrol” button, mapped up in Ableton, and put it all back together:

This works! Now you can move the “guts” of the thing behind the big button:

Now when the big button is red, Ableton is playing, and when it’s dimmed, Ableton is stopped.

Perfect! Grazie della domanda, Italia!