MIDI Designer Reference Manual
Sidebar
Table of Contents
Chapter 14: More Advanced Control Concepts
Hide in Play Mode
Control Properties Pane → Advanced → Hide in Play Mode Sometimes a control is critical in your layout, but not necessary in Play Mode. You may move the control to another page, or put it on a Pedalboard page, or… hide it in Play Mode

Hide in Play Mode
- Controls that are hidden in Play Mode show a yellow background in Design Mode
- Controls that are hidden in Play Mode can still send MIDI out and respond to MIDI in
Hide in Play Mode is useful for both supercontrols and subcontrols.
Bring Up (Play Mode)
Control Properties Pane → Advanced → Bring Up (Play Mode) [Toggle]
Bring Up is used for controls that are physically on top of one another.
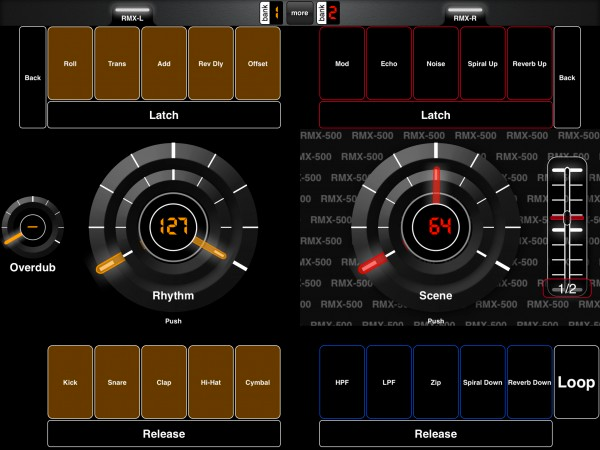
The most common example is a knob that is concentrically placed inside another knob, like in this layout:
Bring Up (Play Mode)
Example
Example
If the outer knobs (both have the label “push”) have “Bring Up (Play Mode)” as ON, while they're being touched they will physically cover the smaller, inner knob.
Open URL
You may change the subtype of a button to launch an external URL. This may be used to open another app. For example:
- audiobus://
- Loopy-hd://
- animoog://
- magellan://
You may discover more schemes here and a more technical reference is here.
To do this, change a button's subtype to Open URL.
Then select or type a URL at in Control Properties Pane → Properties → Open URL.
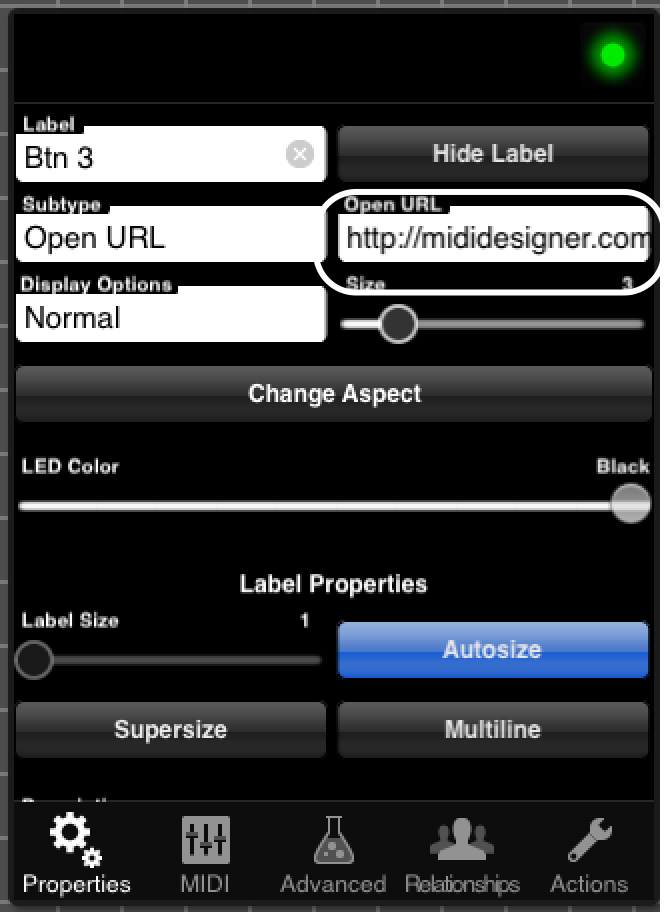
Open URL Field
Open URL buttons always act as momentary buttons.
Open URL buttons will respond to incoming MIDI messages, allowing you to launch apps from an external MIDI controller.
Bit Changer
Bit changers are necessary to work with some older synths, particularly the Yamaha DX-7. Older synths use the different bits of a value to send packed data.
Bit changers alter individual bits of a subcontrols value. As an example, the subcontrol might have a value of 71. In binary, 71 is 1000111. If a bit changer were affecting the 4th bit (from the right, currently 0) the value would be 79. 79 is 1001111 in binary.
What's 71 in binary? [ Google Link ]
What's 1000111 in decimal? [ Google Link, note we prefix with 0b for Google ]
- Make a button
- Change the Subtype to Bit Changer
- Add a subcontrol
- On the MIDI page for the button, change the “Change Bits” field to be the 4th bit. This would be the 4th bit from the right
- Out of design mode, when you switch the button on, a value of 71 in the subcontrol would change to 79. Shutting the button off, a value of 79 would change to 71

Bit Changer Field
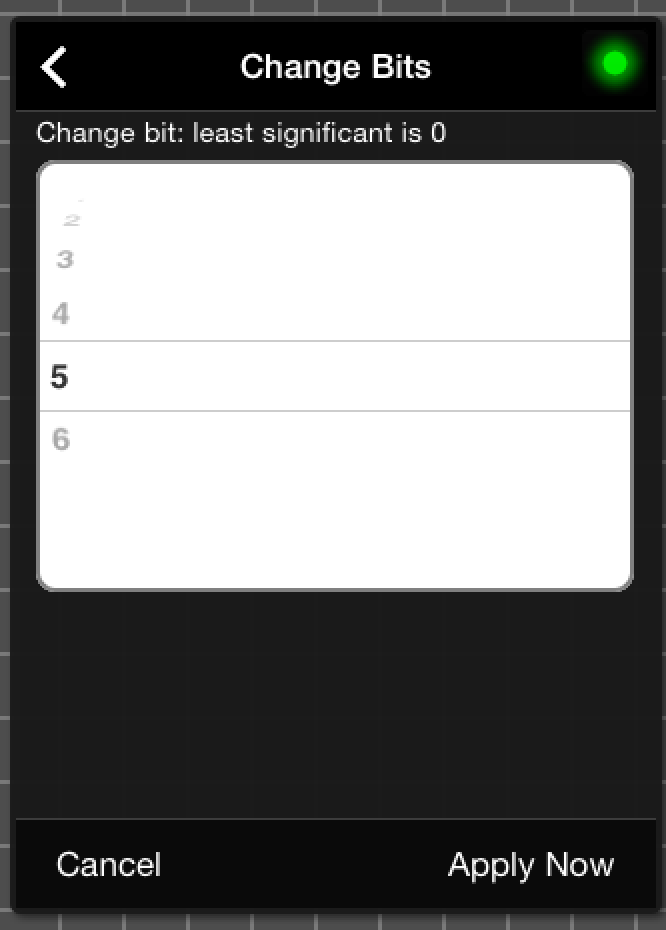
Bit Changer Field
Relative Controls
Control Properties Pane → Subtype → Relative — Variable Controls Only
Relative Controls send their MIDI MAX repeatedly to indicate increase, and their MIDI MIN repeatedly to indicate decrease.
MD will prompt you to accept the default setup for this, which is:
- Three ticks, -1, 0, and 1
- MIDI Range: 63-65
- Default Value of 64

Relative Control
Default Setup Confirmation
Default Setup Confirmation
Given the default setup, as you move your touch upwards (or right on a crossfader or X dimension of an XY Pad), MD sends out a 65. As you move your touch in the other direction, a 63 is sent out.
Ableton Users
See “26.2.4 Mapping to Relative MIDI Controllers” in the Ableton Remote Guide. Use
Relative (BinOffset) can be useful. Setting a higher MIDI max and a lower MIDI min can increase the amount of value change
for each movement.
Relative Controls and Multiple MIDI Messages
Relative variable controls can also be used to send out multiple MIDI messages.
This is not a three-way switch. To create a three-way switch, use Button Groups.
This is different from button groups in that each value continues to send out while your touch continues up or down.
With a variable control:
- Set the subtype to relative
- Make it a supercontrol
- Add 2 or 3 variable controls as subcontrols
- Mark the supercontrol as sequential: Control Properties Pane → Relationships Tab → Options as Super → Sequential (Toggle) to ON
Note: With three subcontrols, the middle one will be sent when you stop touching the supercontrol. If you have only two controls, the first will be sent when increasing, and the second will be send when decreasing.
See Discussion about this feature

Transpose and Octave Transpose
Transpose and Octave Transpose allow you to transpose MIDI messages on controls. To set up:
- Create button or buttons that send note-on (or control change).
- Create a variable control (knob, slider, etc.).
- Set the variable control's subtype to transpose (or octave transpose).
 Default Transpose Confirmation
 - Accept the default transpose steps (affects the display min/max, number of ticks, MIDI Min/Max and default value)
- Make the button or buttons subcontrols of the Transpose knob
The steps are identical for Octave Transpose, and they may be combined.
A variable control of type transpose centers around the default MIDI value. Each value above is a chromatic step up, and each MIDI value below is a chromatic step down.
The same rule applies to controls of type octave transpose, but instead of chromatic steps, they're octaves (12 chromatic steps).
- Transpose can be used for other control types than Note On/Note Off.
- Transpose can be combined with steppers
- Check out this Recipe for transpose with buttons

Named Ticks
Normal Ticks
Ticks refer to “steps” for variable controls, as seen earlier.
Normal Ticks – adjusted via the number of ticks for the control, display MIN & MAX for the control, and MIDI MIN & MAX for the control, provide great flexibility. By default, a variable control has 128 ticks, a display MIN-MAX of 0-127 and a MIDI MIN-MAX of 0-127.
With Normal Ticks you can do the following:
- Make a full-range knob that goes from -5 to +5.
- Create a half-range slider that goes from 0-500 by increments of 10.
- Create a crossfader that goes from -10 to 0 and sends 0-127.
Named Ticks
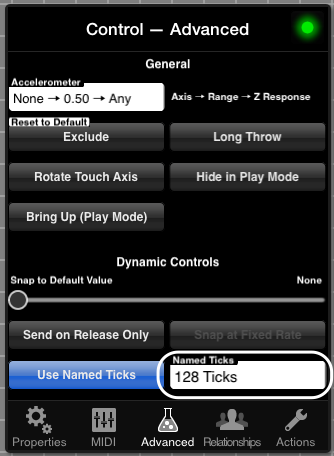
Control Properties Pane → Advanced Tab → Named Ticks (Toggle)
Named Ticks allow you to define each tick (or “step”) of a variable control. Define as many ticks as you need. Each tick has:
- a MIDI value
- a numeric Display value (integer)
- a Name (optional)
By default, variable controls have Named Ticks turned off. Press the Named Ticks toggle to turn Named Ticks on. You will be prompted to convert your current ticks.

Convert Current Ticks
It may take a few tries to set your normal ticks up correctly. Converting Normal Ticks to Named Ticks can be a huge time saver.
Editing Named Ticks
You may edit Named Ticks using the Rich Named Ticks Editor. Tap on the Named Ticks label:
Named Ticks Label
which brings up the Rich Named Ticks Editor.

Named Ticks
Rich Editor
Rich Editor
The Rich Editor allows you to configure every tick:
- The MIDI value that will be sent out
- The numeric, integer display value (-99 to 999)
- Optionally, a text label
The + and - keys on the right allow you to insert a new tick or delete a tick.
You may also automatically renumber using the two Renum buttons.
- The Left Button: The MIDI values, from MIN to MAX. This renumbers based on the Named Ticks that are already present, interpolating between the MIN and the MAX.
- The Right Renum Button: Renumbers the Display Values based on the MIN and MAX display values in the series.
The same MIDI value (and display value, and even label) may be repeated many times in a series. This gives you incredible flexibility. Consider these examples:
- Increase than decrease
- Decrease than increase
- Coarse jumps then finer jumps
- Pentatonic then chromatic scales, etc.
Named Ticks: Edit Text
The Edit Text Panel for Named Ticks gives you the flexibility to:
- Share the same Named Ticks with other controls (or other layouts) by selecting all and using Copy
- Type or use (copy and) paste to enter Named Ticks with greater precision
- Use a spreadsheet or other app to create named ticks and then paste them in to your control

Named Ticks Edit Box
Rules for the Edit Text Box:
- Columns are delimited with a space
- Format is MIDI value, Display Value, and then optional Display Label
- For your ease-of-use, if you omit the Display Value, it will be the same as the MIDI value
- Use a backslash \ before a number for the Display Label, so:
| Edit Text | Translates to |
|---|---|
| 1 \5 | 1 1 5 |
| 1 1 5 | 1 1 5 |
| 1 5 | 1 5 (no label) |

Hiding Display Value (Display)
Using zero for all Display Values will result in a:
- Dash instead of the Display Value for knobs
- The Display Value Display will not be visible for sliders
manual/14_more_advanced_2.txt · Last modified: by 127.0.0.1
Except where otherwise noted, content on this wiki is licensed under the following license: CC Attribution-Share Alike 4.0 International
